Showing posts with label house project. Show all posts
Showing posts with label house project. Show all posts
Tuesday, October 11, 2011
how to: refinishing your vintage finds (part two)
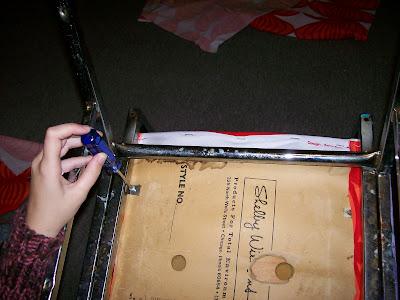
This is part two in a two part series of refinishing your vintage finds. Or semi-vintage, as is the case with these folding chairs inherited from Partner-in-Crime's grandmother. Fairly comfortable due to the padded seat and back, these chairs were not so easy on the eyes. But I knew there was still life in them. A few hours later, they looked like this:
In part one, I covered how to spray paint a great find. But what if your find includes some um, less than current, fabric like these beauties? Part two will teach you how to do a basic re-upholstery job. Often with simple chairs, you can recover the seat without having to actually sew anything because the back or bottom is covered or not visible. That's the case with these folding chairs. Recover your chairs in five* easy steps after the jump.
*Okay, okay. Six. But the sixth one is reattaching the seat.
Labels:
britex fabric,
house project,
refinishing,
repurpose,
upholstry,
vintage find
Friday, October 7, 2011
how to: refinishing your vintage finds (part one)
Labels:
house project,
refinishing,
repurpose,
spray paint,
telephone table,
vintage find
Wednesday, November 4, 2009
quite the pair
When I moved in to the house there was no table or place to eat other than TV trays, so first I found a round wood table for $10 on Craigslist and a couple of chairs to go with it. I only have two chairs, but there are just two of us and it allowed us to stick the table in a corner so that it works well in our space. The chairs were nice but a little beat up, so they needed something to make them pop. Thanks to IKEA I had the perfect solution.


home improvement makeover
 Recently graduated, living off a nonprofit salary and having had 2 days to pick out an apartment in a new city, my new roommate is awesome but the apartment itself is um, lacking...
Work has kept me from doing some of the bigger plans I have- ranging from painting walls to weatherizing windows- but soon after arrival I started on a project that I had been planning even before finding my room. A year ago I bought some beautiful fabric at Joanne's (when my car was broken down in Minnesota) and have used it for a variety of things since.
I wanted to decorate part of my wall with the fabric, but not just as wallpaper. I started out by cutting the top of the fabric down.
 And I also cut out birds individually.
 I cleaned my wall with just water and a sponge. I sprayed the fabric all over with fabric starch. The instructions I found online recommended using either regular starch or spray starch. For such a large piece of fabric, I wish I had regular starch as it was difficult to saturate the fabric with spray starch. You can see the results below- there were definite difficulties getting a tight bond against the wall. I left some tacks along the very edge to keep the fabric up.
 But the results overall- I love them!
The other great thing- the fabric peels off with basically no residue! Just clean the wall with a little water and you are set to go. Fabric is a great choice for those of us who are renting.

 My fabric wall decoration has created a cozy corner with my desk where I can craft, though I'm still in need of the various storage supplies to really set up a neat crafting corner. First house project- completed!
Labels:
create,
DIY,
favorite things,
house project,
repurpose
Subscribe to:
Posts (Atom)


